Technology is a wonderful thing isn’t it?
The industrial Revolution, advances in medical science, the combustion engine, electricity – they’ve all made massive impacts on our lives, but the rate of change over the past 20 years has been nothing short of incredible.
The Internet and computers have driven this meteoric change – and if you’re a musician, one of the biggest benefits is the ability to set-up a home music studio for absolute peanuts – comparatively speaking of course.
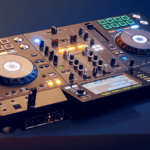
Mixers, reel to reel tape recorders, outboard equipment, amplifiers – they’re all expensive items – but that’s how it was. Today, vintage gear is still very much highly desirable in some professional circles, but for the amateur musician or budding home recordist, setting up a studio is so much more affordable. You simply don’t need all that stuff to get really good results.
There are actually three main ways of setting up an affordable home studio: one is with a standalone recording device; the second is with a tablet like an iPad; the third is via a computer (Mac or PC) and DAW (digital audio workstation) software.
Great results can be had with the first two options but this article will focus on the MAC/PC approach. This is by far the most versatile method and it’s essentially modular, meaning the upgradeability potential is virtually limitless. Let’s get started.
Sound environment
Most articles on home studios launch straight into gear and home studio equipment but we’re gonna go back a step and talk about something equally important – acoustic treatment. The best gear in the world won’t save you from a bad acoustic environment so we need to get that sorted first.

Proper acoustic treatment, the study of sound and how it behaves is indeed a science and it can get really, really expensive not to mention complicated. It’s physics at the end of the day and if you really want to dive deep into it, there’s a ton of material available. Most pro studios won’t skimp on this aspect and will have a budget to reflect its importance.
This article isn’t about the physics of sound so we’re not going to write a thesis on it. Feel free to go somewhere else if you want that.
What we can do however is provide some pointers on how to improve the acoustic environment in which you record relatively simply. You don’t need to spend a fortune.
Why treat your recording space?
The truth is you can, if you’re lucky, make decent quality recordings in an untreated studio but chances are your recording and mixing will benefit significantly from some form of acoustic treatment so this is always something we’d recommend.
Compared to a new guitar, plug-in or other piece of gear, this may not seem the sexiest way to spend your hard-earned money but it’s definitely one of the wisest. Get the foundations right and everything else is so much better from then on. You need to trust us on this one.
Because the bottom line is, you need to be sure that what’s coming out of your studio monitors is as accurate as possible and not overly-influenced by the acoustics of your room. We’re trying to eliminate unwanted reflections, wonky reverberations and other undesirable stuff that affects the journey of sound as it travels from our speakers to our ears.
You could negate some of the effects of acoustic imperfections by recording and mixing solely on headphones but in all honesty, whilst doable, it’s not really practical (unless you’re forced to do so of course because of noise restrictions).
Important note: we’re talking acoustic treatment here, NOT soundproofing. This is all about improving the quality and accuracy of the sound in your studio, not blocking out sound from the outside world. That’s another subject entirely.
How can I improve things?
You probably won’t have much choice in terms of your recording space. Chances are it’ll be a bedroom, a spare room, the corner of the lounge or anywhere else your partner permits you to have. Fortunately, there are things you can do.
Speaker placement
This one’s a no brainer. Remember math classes at school? Me neither, but we need to talk about equilateral triangles – or put another way, a triangle where all the internal angles are 60 degrees.
We don’t have to be quite that precise, but an equilateral triangle does illustrate the desired listening position between our ears and the speakers.
In our seated position, the monitors should be equidistantly spaced on desk stands or floor stands, pointing inwards with your head in the middle. This is where the equilateral triangle analogy comes from.
Also, you really need to keep your monitors off your desk. Hard wood reflects sound and not only that you’ll get weird resonations through the desk itself.
For this reason, floor mounted speaker stands are great, but if that’s not practical (as it isn’t in my studio), we can recommend these desk mounted speaker stands from IsoAcoustics. They do a pretty good job of sound absorption and they’re adjustable to a degree. They work for me.
Acoustic treatment
By treatment, we’re talking panels here and the most commonly used materials to use are rockwool, fiberglass or foam. Rockwool and fiberglass are the best because they absorb lower frequencies much more effectively that foam. Lower frequencies are the hardest to tame.
That said, foam is definitely better than nothing. It does reduce a room’s natural reverberation and reflections and they do absorb higher frequencies pretty effectively but they don’t do much in the lower end. You can buy panels or if you’re a DIY nut you can make your own.
Where to place the panels
Two primary considerations here: taming the lower bass frequencies and eliminating early reflection points from your studio monitors. Let’s take one at a time.
Bass Traps
Bass frequencies are particularly hard to get under control, particularly in far from perfect home studio environments so we need to use bass traps which are usually placed in the upper corners of a room because that’s where bass frequencies tend to build up the most. Ideally you need to consider the ceiling as well.
You can use panels designed specifically for corners or thick panels with air gaps which will achieve a similar result – taming those lower frequencies.
Early reflections
When sitting at your desk, the objective is to hear direct sound from your speakers to your ears. What you don’t want is sound hitting hard reflective surfaces like walls en route causing you to hear the direct sound AND the reflected sound. This is called comb filtering and it’s not good!
Also, although there are times when the natural reverb of a room is desirable – a drum room for example – in a studio environment it’s a definite no no. Adding reverb during a mix is perfectly acceptable and commonplace but if the room’s got tons of unwanted reverb you need to remove it. Acoustic treatment does that.
The first place to put acoustic panels therefore is at those first reflection points on the side walls and to establish exactly where those are, we can use the ‘mirror trick’.
Rather than trying to explain how this works in words, here’s a video that explains how to do it:
An alternative approach is to cover a large area in the approximate reflective zone with panels so you’re sure to hit the sweet spot. Also, remember that the ceiling is a reflection point as well. If you can, make sure you treat that as well.
There are a number of good resources around that explain the principles of acoustic treatment really well.
We can wholeheartedly recommend Graham Cochrane’s Recording Revolution website and in particular this video where his buddy Rob Mayzes at Musician on a Mission offers some really valuable tips. Check it out.
Computer-based recording
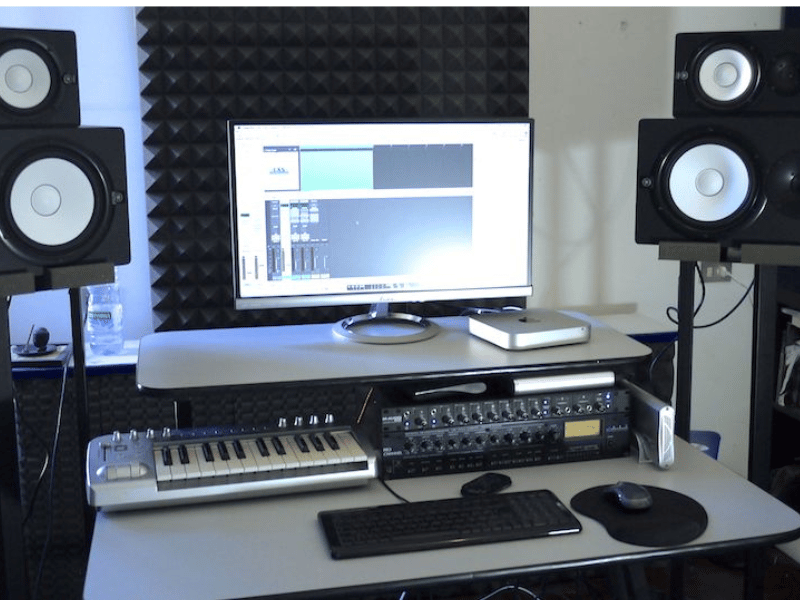
OK so now we’ve addressed room acoustics, we need to get down to the nuts and bolts of what you’ll need to actually set-up your home recording studio. Yes folks, without further ado, it’s time to talk about gear!
We mentioned before that a recording studio is modular. You can add hardware, synths, plugins, effects, mixing desks and a whole host of other things but there are some essentials that you’ll need when setting up any computer-based home recording studio. We’ll discuss each in detail.
The Computer
With the relentless surge of smartphones and tablets, some households won’t even have a computer at all, but for recording music we’d say it was pretty essential. You could opt for a standalone multitrack recorder; you could make great recordings on your iPad, but it’s hard to beat the power and versatility of a desktop or laptop computer.
We have to be careful what we recommend here. If you have a PC or Mac already that’s less than five or six years old, you almost certainly will be able to use it to record music. If you don’t have a computer at all, something middle of the road will do just fine.
If money’s no object, then buy all means shell out $1500 on a dedicated music computer. Chances are however, you’ll have to use it for other tasks as well as music so just buy the best you can afford.
So what kind of spec do you need for recording music? Well, taking a look at the websites of some of the most popular DAW (Digital Audio Workstation) software packages, it’s pretty clear that a pattern emerges here.
Pro Tools for example, states a minimum i5 processor; 8GB or more recommended RAM (memory); and 15GB hard drive for installation alone.
Ableton requires a 64-bit Intel core or AMD multi-core processor; 8GB or more recommended RAM and 76GB hard drive for installation and additional content.
Presonus Studio One recommends minimum Intel Core 2 duo processor or AMD X4; 8GB or more RAM and 40GB hard disk space. Cubase needs i5 or faster processor; 8GB or more RAM and 30GB hard disk space.
With DAW software, the processor speed, RAM and hard drive are the three parts of the equation you need to pay attention to. The speed of the processor and RAM will determine the speed of the processes you run and how many you can have running at once.
When you’re recording a multi-track session with tons of plug-ins and effects running concurrently you need the whole thing to run smoothly and without glitches so go for the highest spec you can afford.
With hard drives, SSDs (solid state drives) are recommended because they can access and process data faster.
Bottom line: if you’re buying a new machine, we’d recommend at least a i7 Quad-core processor with 16GB of RAM and a minimum 1TB hard drive – with an SSD part of the configuration. If you already have a computer, depending on the DAW you choose, check (and check again) it meets the specifications.
Laptop or Desktop? Mac vs PC
Unless you have a reason to use a laptop for recording music then use a desktop. Buck for buck you get far more for your money and greater upgradeability options. Another plus is that you can hook a desktop up to a decent sized monitor which in our opinion means a better workflow.
Cost is a major consideration. A mid-range desktop will probably be absolutely fine for recording music, but the equivalent spec laptop will be much more expensive. Budget laptops won’t cut the mustard.
Of course if portability is important for you, then a laptop may be your only option.
The Mac versus PC debate has no right answer. There are fanboys (and girls) on both sides of the fence and your choice will depend on what you’re familiar with. Luckily, most DAW software comes in both flavors but some don’t. Logic Pro X and Garageband are Mac only. Mixcraft is PC only. This may make the decision for you.
Historically, Macs have been used much more extensively for music production but PCs have definitely caught up. This is probably why demographically Macs are more common in pro studios but there’s no real reason these days why they should be.
A really important factor here is cost. Bang for buck, Macs are miles more expensive than their PC counterparts. For the record (excuse the pun) I use an i7 PC, Windows 10 and 16 GB RAM. My DAW is Mixcraft which is an excellent piece of software for the money.
Digital Audio Workstation (DAW) software
Whilst the hardware you use is of vital importance, the software is somewhat more subjective. Largely, all variants do the same thing: you get more bangs and whistles with some products than you do others, but the important thing is whatever you choose, learn it inside out and unless you have good reason, don’t jump from product to product.
DAW software is your gateway to productivity so the way it looks and handles is important. It’s essentially an entire recording studio inside your PC or MAC. You’ll use the software to record tracks (real and virtual instruments); add effects, designate busses, routing and aux sends; and mixing and possibly mastering.
In the good old days, you’d need a whopping great mixing console, a reel to reel analog multitrack recorder and tons of outboard effects. Now you can find all of that – and more – inside your DAW.
The table below shows a selection of popular DAWs. Click on the links to find out more. You’ll notice that some have free versions (like Pro Tools) while others will have timed demos so you can fully evaluate the software.
Note also that many audio interfaces and MIDI controller keyboards often come bundled with DAW software – which is a really convenient way of trying stuff for free.
| Product Name | iOS or Windows | Website URL |
| Pro Tools | Both | More info |
| Logic X Pro | iOS only | More info |
| Ableton Live | Both | More info |
| Presonus Studio One | Both | More info |
| Reaper | Both | More info |
| Mixcraft | Windows only | More info |
| Cubase | Both | More info |
| Cakewalk by Bandlab | Windows only | More info |
Why do pro studios still use analog gear?
DAW technology has brought high quality recording capabilities to the masses at a fraction of the cost of what was previously possible. But it’s not necessarily better.
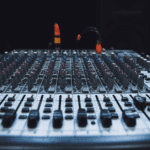
Some pro studios prefer the warmth of analog gear and if you’re recording bands then you need many more inputs than someone recording in their bedroom. A drum kit alone could have a dozen microphones placed around the kit so you’d need a multichannel mixer to process all these inputs.
Also, many guitarists and bassists still prefer to mike up their stage rigs in the studio. Amp simulation software (used within the DAW) is really good quality these days but it’s still not the same as a mic’d up Mesa Boogie.
Truth is, most pro studios will use a combination of old and new technology. And some home recording studios will do the same. Much of it will depend on budget and your own personal circumstances.
A word about plugins
Essentially, plugins can be effects or instruments. You call up a particular plug-in from within your DAW and the controls are similar to their hardware variants.
Typical plugins include amp simulators, effects like reverb, chorus, delay and compression and soft synths. Roland for example, through its ‘Roland Cloud’ has all its legendary synths and drum machines available as plugins.
So if you hanker for the classic sounds of the Juno 106, Jupiter 8, D-50, TR-808 or XV-5080 to name just a few, you can buy them as plugins to use in any DAW.
Other websites like Plugin Boutique are great for sourcing just about anything you need. You’ll need to part with cash to obtain most plugins, but some are free. You simply download them to your computer to a particular folder, and then tell your DAW where to find it. It can then be called up at any time from within your DAW.
Audio interfaces
An audio interface is pivotal to your recording set-up. It converts analog instruments – guitars, hardware synths, microphones – into digital signals that can be processed by your computer. Essentially, it’s an analog to digital converter.
And speaking of audio interfaces; if you crave really detailed information, we published an in-depth article on the subject right here.
These days, audio interfaces tend to be external devices and connect to your PC or Mac via USB, Thunderbolt or Firewire. You simply hook them up and configure the specific model you have through your DAW.
Unlike a mixer (which we’ll get to in a minute) their primary objective is to get a clean signal from your microphone or guitar into your DAW. Often these signals from source however are too low level to be processed by said DAW so they need to be amplified. This is precisely why audio interfaces contain built in preamps – to boost the incoming signal.
Mic preamps vary in quality. Sometimes they’re not built into the interface – they come as standalone units. They can be really expensive because in pro studio environments models are selected for their character and warmth – much like guitarists favor certain valve amps to get the sound they want.
But rest assured, even at the budget end of the market, most audio interfaces come with decent preamps that will satisfy the needs of the vast majority of home recordists.
Can’t I use the soundcard built into my computer?
In theory you can – but you won’t like the results. The audio quality will be poor; you’ll get horrible latency (the time delay for an analog signal like a microphone or guitar to be converted to digital, processed by the computer, converted back to analog again and output via the monitors.
Latency is measured in milliseconds and it needs to be a low as possible. Inbuilt soundcards just aren’t up to the task. Audio interfaces, even budget models do a pretty good job of handling latency. Many offer zero latency direct monitoring.
How many inputs do I need?
That depends on what you intend to do with it. Because we’re multitracking in the vast majority of home recording applications and only recording one thing at a time, technically one XLR mic input and one line (guitar) input is probably all you’ll need.
On the other hand, if you’re recording an entire drum kit, mic’ing up each drum, or using the interface to record an entire band live, you’ll need more inputs.
Remember the primary function of an audio interface is to get clean, pure sound into your computer. Further processing, like adding effects, Eq and panning is carried out in your DAW.
So what should I buy?
This article isn’t really about what specific products to buy, but the good news is that that you don’t have to pay a fortune to get great quality results. Let’s zoom in on a few.
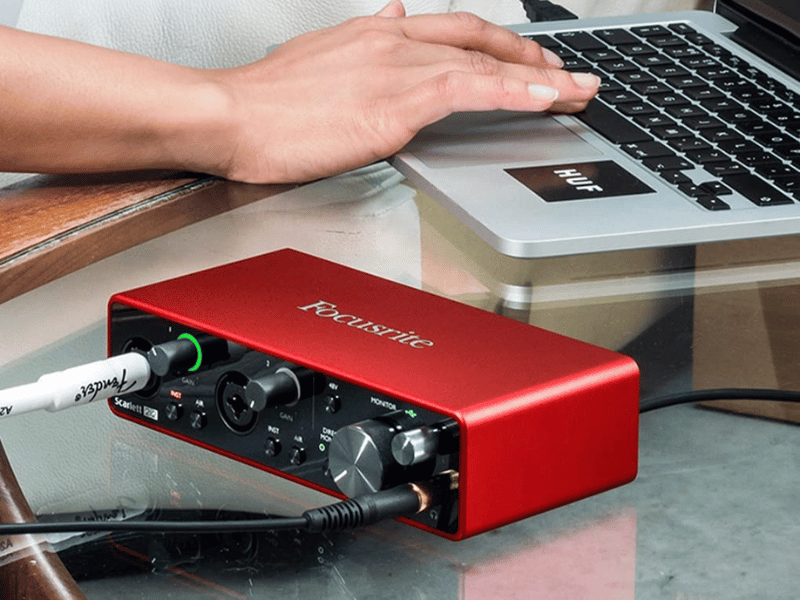
Focusrite for example, make really excellent, cost-effective audio interfaces. The Scarlett Solo is hard to beat at just over a hundred bucks. It offers 24-bit/192kHz recording quality; a decent quality mic preamp and a line input. If you need more versatility the Behringer UMC404HD has four inputs and gets a ton of great reviews.
If four inputs aren’t enough, let’s go large. Sticking with Focusrite, the 18i20 Scarlett audio interface offers a whopping 18 inputs, four monitor outs and eight high quality preamps. And it comes with a free copy of Pro Tools First digital audio workstation software which is a really nice bonus.
One other thing before we move on: if you have a condenser microphone you intend to record, you’ll need phantom power to drive it. Most audio interfaces have this function, but check to make sure before you buy.
Listen Up: headphones & monitors
Without stating the obvious, you’re going to need something to hear what you’re recording and that means a set of studio monitors or headphones – preferably both.
Let’s start with monitors. Now, technically it is possible to record, mix and even master on bog standard hi-fi speakers but it’s not recommended and that’s because hi-fi speakers are designed to flatter the sound to make it sound sonically pleasing.
Studio monitors however exist to provide sound that is neutral and uncolored. The objective here is that your mixes should sound great on whatever you play them on: hi-fi system; car stereo; mobile phone or smart speaker. When we’re recording, mixing or even mastering, we need to know that our speakers are accurately representing the recorded sound.
The term ‘accurate’ of course is subjective. You can have the best, most expensive monitors installed in your studio, but if the room is untreated acoustically, chances are they’ll sound rank, so bear in mind that your monitors are only part of the equation. Acoustic treatment is every bit as important.
The best bit of advice we can give you is to decide on a budget and try and many speakers within your financial restraints. It’s really important to get to know your own speakers in your own recording environment.
Play tons of music from your favorite artist(s) through them. Note how the bass, mids and upper frequencies sound, make mental notes and apply the logic to your own mixes. There’s no magic pill behind this. It’s all about getting to know your monitors sonically and recognising their specific strengths and weaknesses.
In terms of monitor types, there are three main types to consider: passive, powered and active. Visually they look identical but the main practical difference is that powered and active monitors are plugged into the mains and passives are powered via an external amplifier.
When discussing powered and active, the two types are almost used interchangeably. Both are mains powered but there are differences in terms of what’s called the crossover which is an electronic device that takes a high-level input signal, separates the frequencies and distributes it to the appropriate driver – woofer, tweeter and mid-range for example with a three-way speaker.
With a passive speaker, that high-level input signal is provided via an external amplifier. In the case of powered monitors, the input is provided through an internal amplifier built into the speaker itself.
And with an active monitor, there’s multiple internal amplifiers each feeding their respective drivers. The frequency splitting takes place in the signal path just before the amplifiers.
Is one type better than the other?
The main advantage with passive speakers is that you can mix and match your amp/speaker set-up and you can upgrade one without the other if you want. But if that’s not important to you, we think active speakers are the way to go.
They’re self-contained and take up less real-estate. Also, there’s an amplifier for each driver so at least theoretically, the amp/driver combo should be well-matched.
This is a tough one to quantify but don’t overdo it on the size and power of the monitors. The temptation is to go for the biggest you can afford but if you’re only working in a modest bedroom or home studio setup, over-powered monitors could quite easily overwhelm your recording space.
And speaking of overwhelm, there’s an absolute ton of studio monitors available in the marketplace. Look out for established brands like Yamaha, JBL, Tannoy, KRK, Genelec, Adams and Mackie.
And don’t forget the speaker stands we spoke about earlier.
It’s in the can(s)
We’ll start with a statement of fact here: it is possible to record, mix and master on a decent set of headphones without going anywhere near a pair of studio monitors. So if you’re on a budget, don’t feel compromised if headphones are all you can afford.
And that’s because there’s some definite plus points to recording and mixing with headphones. Generally, they’re cheaper than studio monitors and importantly you get a consistent more detailed sound. On the bus, recording at a friend’s house, sitting in a coffee shop – the sound from your cans will be the same. You can really ‘lock-in’ and focus on a mix.
And they negate the need for acoustic treatment. We would always recommend acoustically treating your studio but if you’re hard up, short of funds and skint, using headphones means you can circumnavigate this problem – even if only temporarily.
But ideally, you need both because it’s good practice to hear your mixes on as many sources as possible. An advantage of monitors is that stereo imaging is more natural. It can be too clinical in headphones. Also, in long sessions, monitors are far less fatiguing than cans.
But lets’ take a look at headphones in more detail:
Open back vs close back headphones
As soon as you start researching which headphones to buy, you’ll quickly discover that there are two types: open back and closed back. Each type has their strengths and weaknesses.
Open back
Open back headphones sound better. Not surprisingly perhaps, the fact they do have open backs means the sound is more airy and less confined. It’s more like sitting in a room listening to music; you’ll be able to hear ambient noise in the room and you’ll be more aware of your environment.
Generally, open back headphones are more comfortable than closed back and because the sound has more air to it (and they’re not physically sitting around your ears), they’re less prone to listening fatigue.
Closed back
The opposite really: nothing comes in; nothing goes out. You’ll know how annoying it can be sitting in a train carriage and the person next to you is playing music and you can hear every note? Well that’s because they’re using open backed headphones. You don’t get that with closed back. The sound is isolated. You’ll be instantly more popular with train passengers.
What does that mean in the studio?
Well for mixing, it’s a mixed bag. Some people like the ‘openness’ of open back headphones but if your recording space is a little noisy or you’re into highly detailed listening, you may prefer closed backs. For pure listening pleasure however, open backs are hard to beat.
However, for recording, closed backs are the preferred choice simply because they minimize sound bleed.
And it’s important: a sensitive condenser microphone will not only pick up the velvety overtones of your voice or acoustic guitar – it’ll also pick up on unwanted sound bleed from your open back cans as well. For these types of applications it’s a no-brainer: closed back all the way. If you record ‘on the go’ in noisy environments as well, it’s closed backs.
Ideally having both types in your studio is the best option if you can afford it. If you can only stretch to one pair, we’d say go for closed back headphones simply because of mic bleed scenario.
Headphones is one area where you certainly won’t be spoiled for choice. Names like Sony, Sennheiser, Beyerdynamic, AKG and Sony are really reputable companies that manufacture excellent products.
Headphone impedance
Headphone impedance can be confusing. You’ll be browsing different types and some will say things like 32-ohm or 250-ohm impedance. What the hell does that mean and is it important?
The answer depends on what you’re going to be plugging your headphones into. For low output mobile devices like smartphones, tablets and laptops you need cans with a low impedance like 32 ohms. Because the impedance is low, they require less power to get a decent output volume.
But if you plug 250- or 600-ohm (high impedance) cans into a mobile phone for example, you’ll be really struggling to get a decent output volume, even with the volume maxxed out on the device.
In a studio environment however, where your power is coming from an audio interface or a headphone amp, this will generally be man enough to drive high impedance headphones – but please do check. I use a Tascam US-4×4 audio interface which has a headphone output of 45mW. Tascam advise a headphone impedance of 32-50-ohms so that’s definitely on the low side.
What sounds best? Low or high impedance headphones?
This is a hotly debated area and you’ll get wildly different opinions here but we’d say that if your interface/amp has got the balls to power higher impedance cans, then arguably, the sound is better. Hard to describe; it’s a bit more polished, but it will depend on the quality of the source material you’re listening to.
Really not something to get too hung up on. Better to listen to as many different types of headphones as you can on your own individual set-up and make your choice based on that rather than impedance ratings.
MIDI synthesizers and MIDI controllers
When we talk about MIDI controllers, we’re talking mainly about keyboards which is where this particular section of the article will focus.
Be aware though that keyboards aren’t by any means the only MIDI controllers available: beat and loop makers often favor pad controllers like Native Instruments’ Maschine. There’s a ton of informative information around if you’d like to find out more. In this article however, we’re going down the keyboard route.
But straight off the bat, we need to make the distinction between hardware synthesizers and MIDI keyboards.
Both can look pretty similar – keys, knobs and dials – but that’s where the similarity ends. The fundamental difference is that hardware synths have built-in sounds of their own; MIDI controllers don’t; they’re just used to control (and play) sounds from plugins within your DAW or perhaps a MIDI sound module.
Hardware synths can also be used as MIDI controller keyboards.
If you’re going to be using a hardware synth, you’re going to have to think about connectivity. If your audio interface has MIDI ports, you can connect those to the MIDI ports on your synth. If it doesn’t, you can purchase a MIDI to USB cable and connect it up to your computer that way.
To access it in your DAW you’ll have to select it under a preferences menu. This will naturally vary depending in your software but make sure it’s selected.
Remember also that if you are using a hardware synth, to record actual sound, you’ll need enough line inputs on your audio interface to accommodate it. That’s two for stereo obviously.
If, on the other hand, you don’t have a hardware synth, you’ll still need a means of triggering sounds from plugins in your DAW; and for that you’ll need a MIDI keyboard. There’s an absolute ton of options here.
The first to consider is the number and size of the keys. MIDI keyboards come in a plethora of sizes – with the most common being 25, 49, 61 and 88 key. All sizes are available with full-sized keys but bear in mind that some 25 key MIDI controllers – like the M Audio Keystation Mini 32 MK3 also have mini keys as well. If you’ve got sausage fingers like I have, these can be a bit awkward. Personally, I prefer full-sized keys like those on the Alesis V25
The great thing about 25 key models is their portability. All have octave shift buttons so 25 keys needn’t be a liability.
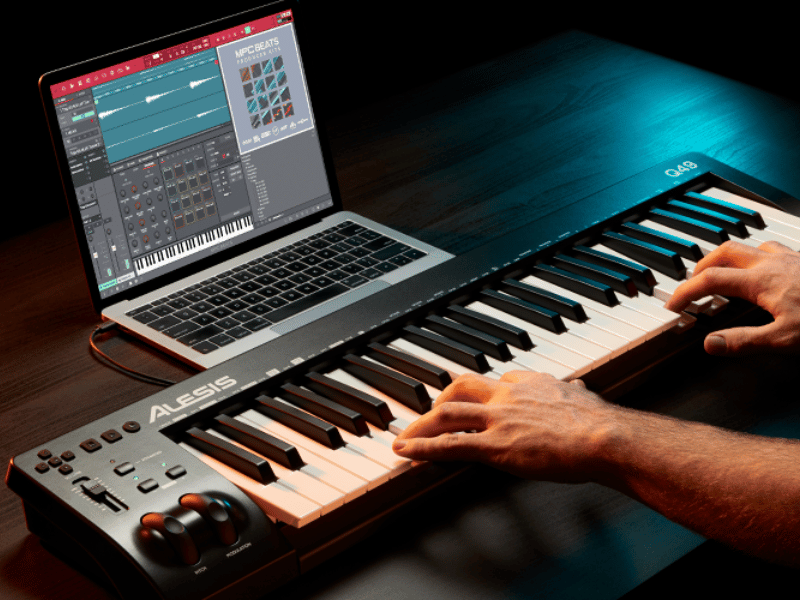
But you might generally prefer more keys and if you do, something like the Alesis Q49 would fit the bill. This is something of a halfway house. You get 49 full-sized keys (4 octaves) in a compact unit which should easily fit on a desk. If you want to go even higher, then 88 key variants with weighted keys are pretty much full-size.
As functionality goes up, so does the price. Some MIDI keyboards include shedloads of button, sliders, knobs and even drum pads. The main reason for these is that many come with templates for the most popular DAWS so you can control software parameters from the keyboard controls rather than mouse clicking on your computer.
Some people like this additional functionality; others are indifferent. It can improve your workflow but it’s certainly not a necessity. The other thing to consider is the feel of the keyboard itself.
There are some pretty cheap MIDI keyboards around and inevitably, on some budget models, compromises have been made on the quality of the keys. They can feel cheap and tacky so try before you buy if you can.
Personally, from experience we find the aforementioned Alesis Q49 a pretty good budget MIDI controller. Its functions are basic but the keys are quite responsive and tactile.
Connectivity to your computer these days is more often than not via USB. Notable brands include Novation, Akai, Alesis, Native Instruments, Arturia, Korg and Nektar.
Microphones
Throughout your recording career, you’ll probably amass quite a few microphones for different applications, but if you’re just starting out, what should you get?
As always, it depends on what you want to do.
If you just want a good all-round, versatile microphone for recording vocals and acoustic guitar that also sounds pretty good mic’ing up a guitar cab or two then a cardioid large diaphragm condenser is a really good investment.
Cardioid mics by the way are sensitive to sound coming from the front of the microphone and reject sound from the sides and rear.
In our round-up of the best microphones for recording vocals, we went for the Rode NT1 for its honest sound and flat, smooth frequency curve.
The NT1 is a great mic because it’s relatively inexpensive and sounds good whatever you throw at it. If we had to buy one microphone for our home studio, then this would be it.
If you’re a bit more flush, consider buying a dynamic microphone as well. The legendary Shure SM57 for example is the de facto industry standard for mic’ing up electric guitar cabs, but it’s also great on vocals. Dynamic microphones are less sensitive generally than condensers but may well be ideal if you’re a gravelly, rock crooner or death metal screamer.
Other bits and bobs
We’re just about coming to the end of our shopping list now but there are other somewhat less sexy – but vitally important – items to put on the list.
It’s easy to skimp on cabling but you’ll wish you hadn’t. Always buy decent quality cables – they’ll last you a long time and keep annoying interference noise at bay. The other two things you won’t be able to live without are a microphone stand and a popshield.
Not much we can say here really. Boom mic stands are versatile because they can be used to mic up guitar cabs as well as provide a home for your vocal mic.
Popshields are probably one of the most overlooked items in a home studio but you need one to remove the sibilants and plosives (‘s’ and ‘p’ sounds) from your vocal performances. Some mic packages include a popshield and some don’t but you’ll definitely need one.
Conclusion
This list of home studio goodies is by no means exhaustive but it is intended to give you a good handle on the basic items of equipment you’ll need to get going.
And the best thing – you really don’t need to break the bank to get started.