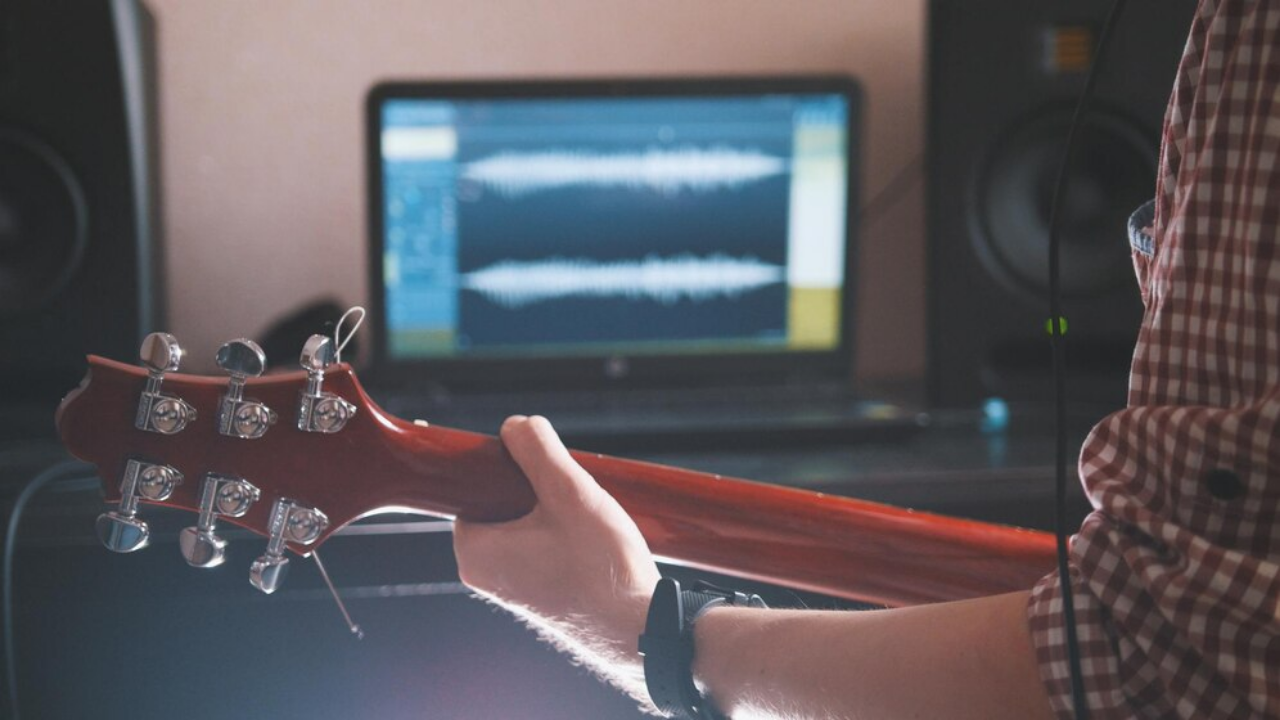
Not so long ago (well it is quite a while actually), the question of how to play a guitar through a computer and establishing a guitar to computer interface really wouldn’t have been valid.
That’s because traditional recording studios and analog recording equipment didn’t use computers at all – in fact personal computers didn’t reach the heights of popularity until the 1980s.
Back in the day, the conventional way of recording guitar was to mic up an amp with a dynamic microphone like a Shure SM57, plug it straight into the mixing desk and record onto tape. Actually, this process is far from outdated. Some studios are still kitted out with analog gear – favored for its warmth of sound and character – particularly when recording guitar.
But today, in home and professional studios alike, computers are the norm along with DAW (Digital Audio Workstation) software. Collectively, they’re the very epicenter of any recording set-up, handling analog instruments, MIDI equipment, effects and plugins in a convenient package.
The advantages are obvious: compact, relatively inexpensive and unlimited tracks. Even a modest tape-based set-up from yesteryear if you factor in the mixer, outboard, tape machines and something to master on, would have set you back thousands of dollars. Computers have brought recording to the masses. All facets of the recording process are now ‘in the box’.
We should note that we’re making an assumption here – that you want to not only play your guitar through your computer – but you also want to actually record it. Let’s get started.
So what equipment do you need for connecting your guitar to a computer?
Pivotal to any recording set-up is an audio interface and if you’re looking to play guitar through your computer, this should be the first thing on your shopping list.
They come in all shapes and sizes with varying degrees of functionality and inputs/outputs but essentially, they take the electrical signal from your microphone or guitar and boost it via an internal pre-amplifier (preamp).
Then, courtesy of an integral analog to digital converter (A/D), that electrical signal is converted to a digital format so your computer and DAW software can make sense of it. That’s how the recording process takes place. The DAW can only read digital signals.
Of course once you’ve recorded something in your DAW and want to play it back through your monitors or headphones, the whole thing works in reverse. Then, digital to analog converters (D/A) come into play to produce an analog signal. Your audio interface does all this stuff and more!
Are there different types of audio interfaces?
Yep. Some of the most common brands are Presonus, Focusrite, Tascam, M-Audio and Behringer and all have something for everyone in their respective product ranges. The main difference between different models is the number of inputs and outputs and the quality of the preamps. Rest assured even lower end models are capable of producing excellent sonic quality.
Also, if you’re a solo performer/guitarist, the number of inputs isn’t really important. You’ll be multitracking and only recording one instrument at a time so you only really need one input. Need more info? Check out our article on what audio interfaces do.
If you had a synth with multiple outputs, you’d need more inputs. If you were mic’ing up a drum kit with a plethora of microphones, you’d need more inputs. If you were recording multiple performers simultaneously, you’d need more inputs; you get the idea, but here we’re talking about recording guitar so you don’t need all that stuff.
This is an info article so we’re not going to get into deep product reviews, but just as an example illustrating that you don’t need to take out a small mortgage for this gear – for just over $100 you can bag yourself a Presonus AudioBox iOne audio interface.

This connects to your computer via USB so no external power is required. It features 24-bit resolution and sample rates up to 96kHz. It works on Mac, Windows PC and even iPad.
The freebies keep on coming. The AudioBox iOne is bundled with Presonus Studio Artist – a version of its bestselling DAW – and its Studio Magic software suite which comprises a copy of Ableton Live Lite, various tutorials, six virtual instruments and nine effects plugins with a retail value of over $1,000!
We’re not singling out the Presonus for special mention specifically – you won’t go wrong with any of the manufacturers we mentioned above – but for those on a budget, you do get a lot of bang for your buck.
Just in case it’s not clear: the real advantage of computers and DAWs over analog mixing desks and tape machines is that you’re not limited to a rigid number of channels/tracks.
With a 16-channel analog mixing desk you’re really limited to 16 tracks – but with a computer/DAW/audio interface setup, that limitation goes out the window – even if your interface only has a single input. It’s not difficult to see why this format is so popular to budding home studio owners is it?
Stay connected
So how are audio interfaces connected to your PC or Mac?
The most common connectivity methods are USB 2, USB 3 and Thunderbolt, but is the format really important when it comes to connecting your guitar to a computer or recording music in general for that matter?
Generally, there’s a ton of reasons why going for the fastest bandwidth you can afford is a good idea. Comparing the various formats: USB 2.0 transfers data at 480Mbps; USB 3.0 at 5Gbps and USB 3.1 at 10Gbps.
Pretty good, but wait until you see the stats for Thunderbolt at 10Gbps, or Thunderbolt 2 at 20Gbps and Thunderbolt 3 hitting the heady heights of a whopping 40Gbps!
But for music recording applications and for those wanting to connect a guitar to a computer it seems generally it really doesn’t matter.
Let’s take USB 2.0 vs USB 3.0 as an example. USB 3 is much, much faster, but according to Focusrite, who know a thing or two about this stuff, there are no perceivable round-trip latency benefits comparing one with the other.
Focusrite tested its 18 input Scarlett 18i20/Clarett 8Pre USB, USB 2.0 interface and found that it provided more than enough bandwidth for delivering 18 channels of audio inputs and 20 channels of audio outputs simultaneously. There’s the evidence so don’t stress over it.
IK Multimedia iRig HD 2
if you just need something altogether more compact than a dedicated audio interface and don’t need multiple inputs, you could do far worse than consider the IK Multimedia iRig HD 2.
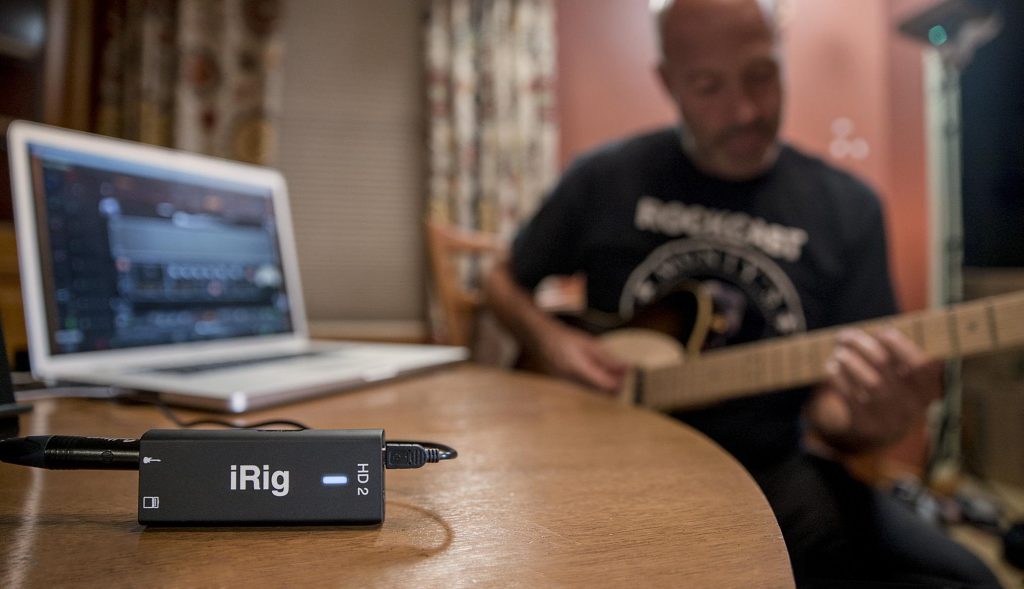
In reality this is still an audio interface but it has other talents – like being able to connect your guitar to it and use it as a virtual effects stomp box via IK Multimedia’s AmpliTube guitar amp simulation software that comes bundled with it. This means you can play your guitar with a range of high-quality effects when you’re out and about. Neat.
It also comes with a cable for connecting to your iPhone 7 (or later) or iPad Pro – devices that don’t have dedicated headphone ports. You just plug straight into the lightning port. There’s also a cable for connecting the iRig HD 2 to a USB port on your PC or Mac. This is how it can operate as a dedicated audio interface – albeit a fairly simple one.
But that’s not all. You can even use the virtual stomp box functionality in a live environment; there’s a Velcro clip for attaching to a microphone stand. In this application you can run a cable from the iRig to an external amplifier, effectively using your iOS device as an effects unit.
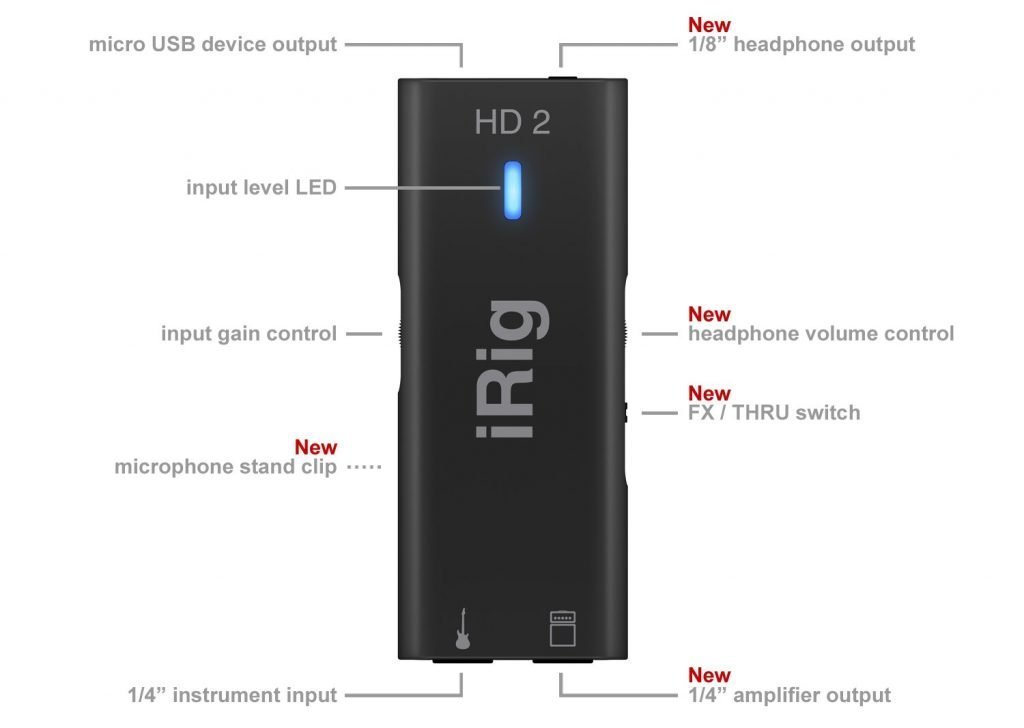
Although compact, there are many connectivity ports on the iRig HD 2 that you need to know about. One port will connect the unit to either your iDevice or DAW. There’s another mini jack to connect headphones to and there’s also pre-amp gain and headphone volume controls on the side of the unit.
Did we mention you get a free unlocked version of esteemed amp simulation software AmpliTube bundled with this? This can be for your iDevice or DAW, giving you access to a ton of amps and effects.
At the other end of the iRig device are two ¼” jacks: one is to plug your guitar into; the other is for routing out to a guitar amplifier, mixing desk or similar. A toggle switch on the unit means you can utilize or bypass the AmpliTube effects.
This is a great little device but it has limitations. As a portable guitar rig, it’s brilliant. In a multi-instrument recording environment we’d recommend a more functional audio interface with more inputs. With 24-bit A/D converters and 96kHz sample rate capability, this is a top-quality interface.
One other thing. If you’re looking to use this with a mobile device, it’s iOS only. As an interface it works with PC or Mac.
Latency
We’ve mentioned latency quite a bit already in this article but what is it exactly?
Simply put, latency is the time it takes from when you pluck a guitar string or hit a key on a keyboard to when you hear that sound coming out of your computer speakers or monitors. This video explains it in more detail.
Usually measured in milliseconds (ms) you really want this figure to be as low as possible. You’ll know when it becomes excessive because of the lag between what you play and what you hear. In extreme cases it’s absolutely horrible, making playing practically impossible. But with a decent computer and interface, you can keep this to a minimum.
Someone’s knocking at my DAW
The next thing you’ll need on your shopping list to play your guitar through your computer is Digital Audio Workstation (DAW) software.
Effectively, this is the control center of your audio setup. You’ll use it to handle recording, mixing, adding instruments (virtual and physical), and even mastering. DAW software basically replaces the mixing desk, tape machine and audio effects that adorned the recording studios of yesteryear.
In terms of what choice of DAW to go for, here’s where things get a little subjective because there is no correct answer or ‘best’ DAW. Ultimately, the sensible way forward is to try a few and see what suits your workflow best.
The majority of DAWs have a price tag, but some are free and most have downloadable demo and trial versions you can try. As we’ve mentioned, if you buy an audio interface or a keyboard controller, chances are it will come with a limited version of a DAW so that’s a great way to start making music straightaway.
This list is by no means exhaustive, but here are a few DAWs to give you something to think about. It’s really hard to make recommendations here but one thing we would say is that once you’ve decided on a DAW, stick with it and learn it thoroughly.
This is sound advice with any software – there’s always a learning curve – and DAWs are no different. Learn it inside out; it’s time well spent!
| Product Name | Trial? | iOS or Windows | Website URL | Cost | Notes |
|---|---|---|---|---|---|
| ProTools | No | Both | More info | From $29.99/mo | ProTools First is free |
| Logic X Pro | Yes | iOS only | More info | $199.99 | |
| Ableton Live | Yes | Both | More info | From $99.99 | |
| Presonus Studio One | Yes | Both | More info | From $99.95 | Free version (Prime) coming soon |
| Reaper | Yes | Both | More info | From $60 | Free to try |
| Mixcraft | No | Windows only | More info | From $75 | |
| Cubase | Yes | Both | More info | From $99.99 | |
| Cakewalk by Bandlab | N/A | Windows only | More info | Free |
Let the music flow
OK, so we’ve now got an audio interface sorted and we’ve chosen a DAW that we like. Now let’s talk about the actual mechanics of getting sound into your computer.
You have an electric guitar and a guitar amp
This one’s pretty straightforward – but there are two options. Many modern guitar amplifiers are equipped with USB ports so it’s a simple case of connecting the amp to your computer via USB cable – effectively using the amp as an audio interface.
The amp can be selected in your DAW preferences and you’re good to go. Not all amps have this functionality and if you’re a fan of vintage guitar amplifiers they certainly won’t, but there’s quite a few that do: the Blackstar ID Core 10 V2 for example or the Boss Katana series or Fender Mustang.
The alternative is to mic up your guitar amp. If you don’t have a microphone this will be an additional expense but if you’re looking to get into home music recording you can never have enough mics.
There’s no ‘right’ choice here, but the de facto microphone for mic’ing up guitar amps is the Shure SM57 – and it’s less than $100. This is a dynamic microphone used for this application in studios the world over but in reality, use any mic you can get your hands on that’s decent quality.
Ideally, use an XLR cable to plug the mic into your audio interface and thrash away. Oh and you’ll need a microphone stand as well. Input/output levels can be set in your DAW and this method also takes advantage of the fact that you can use effects built into your guitar amp to get the sound you want – or use effects plugins in your DAW.
You have an acoustic guitar with a built-in pickup or an acoustic electric guitar
Again there are choices here. You could simply plug a guitar lead into your guitar’s output and plug the other end into your audio interface. This will work absolutely fine.
But for recording purposes, many guitarists get the best results using a large or small diaphragm condenser microphone aimed at the 12th fret about 8 inches away. Again you would use an XLR cable to plug into your interface.
Although this method produces the best results in our experience, it does mean additional costs. A half decent large diaphragm condenser like the Rode NT-1 will set you back around $200 so you need to take this into consideration. However a large condenser mic will have a multitude of uses so if the wallet will stretch to a purchase, it’s a sound investment.
You have an acoustic guitar with no pickup
You’re a bit backed into a corner with this scenario. It’s a microphone about 8” from the 12th fret plugged into your audio interface via an XLR cable. That’s about it.
You have an electric guitar with no amplifier
Aha, now we’re getting into the realm of guitar amp simulation software…
In reality, whilst the sound of a Gibson Les Paul plugged into a Marshall stack may be a utopia in terms of guitar sounds, for the bedroom strummer it’s not exactly practical. We all have neighbors; some of us live in apartments and of course there’s other family members to consider. Clanking out Smoke on the Water at 3 am just might not go down too well.
But fear not – there are workarounds. You could buy a really good quality small amp, mic it up, plug it into your audio interface and try and keep the volume restrained. The success of this approach will depend largely on your own personal circumstances. You may get away with it.
For everyone else, thank the stars, there’s guitar amp simulation software. This has really taken off in recent years and there’s plenty of options to choose from. In our opinion, they’re not really a substitute for said Les Paul and Marshall stack but they’re a great alternative.
Because guitar amp simulation software ‘lives’ in your DAW, you have ultimate control over sounds and effects. You can also control the volume and play through headphones. Your neighbors will thank you.
But that’s not all: you can have almost limitless control over your sound: choose a different amp; choose a different cab; add a bit of chorus or delay; change the microphone configuration; switch from high gain to low gain; invent your own killer sounds and save them for instant recall. Life is good!
Amp sims
We’re not evading the thousand-dollar question here, but recommending amp simulation software is as insanely difficult as recommending a DAW. Type ‘what’s the best guitar amp sim’ into Google and you’ll see what we mean.
It’s all about personal preferences and the way you like to work. Guitar sounds are personal; one man’s symphony is another man’s cacophony. There’s no one size fits all or magic bullet but any decent amp sim will give you total control over your sound, offering a multitude of different amps and cabs, microphones, effects, built-in tuners, MIDI and more.
Amp sims are always a hotly debated topic and fans will vigorously defend their own personal favorites but in reality, there’s not much difference between any of them. Try as many as you can.
Oh, before we forget: all of these options can be installed and operated as standalone applications. If you have absolutely no interest in recording your music, and you need to keep costs down, you don’t even need a DAW.
We suspect however that most guitarists will be using amp sims as part of their overall recording set-up and will be using them predominantly as plugins within their DAWs. Nice to have the option though!
IK Multimedia AmpliTube 4
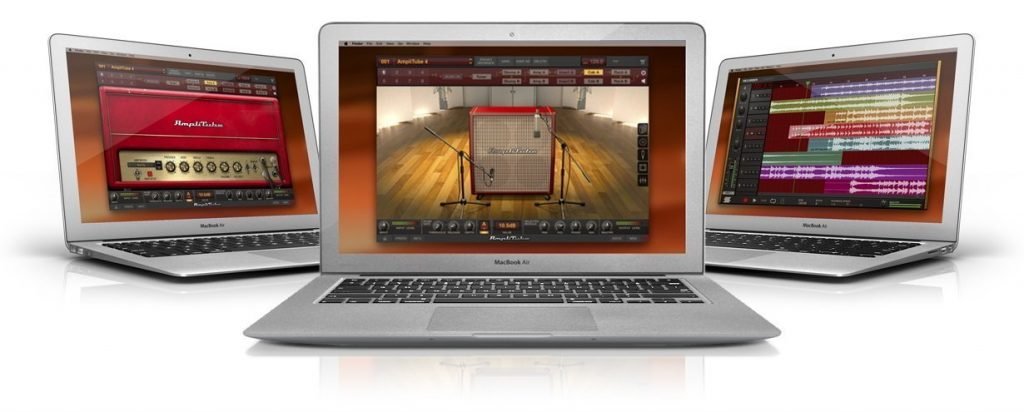
IK Multimedia’s AmpliTube 4 is one of the leaders of the pack and it comes packed with a wealth of different guitar amps, cabs and effects. You can also buy additional packs such as AmpliTube Slash, AmpliTube Joe Satriani and AmpliTube Jimi Hendrix to emulate your axe wielding heroes. Loads of customization options here.
In standalone mode there’s even a built-in 8-track recorder and if that’s not enough there’s a free version of the software – Custom Shop – which comes with 24 free pieces of gear.
The cost of full version of AmpliTube is $149.99. Additional packages cost extra. Try before you buy is an option. PC and Mac compatible.
Positive Grid Bias FX 2
Positive Grid has a number of guitar-based goodies available to buy but its most popular software is BIAS FX 2. There are three options to choose from: Standard ($99), Professional ($199) and Elite ($299). PC and Mac compatible.
As you work your way up the ladder, you get more stuff. The Standard version has 30 amps, 43 effects and 70 presets whereas the full Monty Elite has 100 amps, 122 effects and 210 presets. There are also bundles available and a trial option
Overloud TH-U
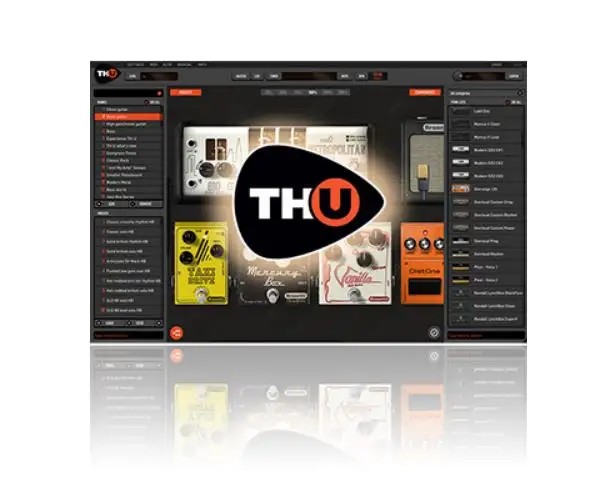
Overloud is an Italian company that has really made its mark in the amp sim world over the past few years.
At €269, the full version of the TH-U software isn’t cheap but you get a phenomenal amount of bang for your buck: 89 guitar amps; 4 bass amps; 77 pedals and rack effects; 18 microphones and 1,000 presets.
Overloud also offers downloadable signal chains created from real setups called Guitar Rigs to provide even more functionality. These are relatively inexpensive and certainly worth checking out. PC and Mac compatible and you can download demo software before you take the plunge.
Native Instruments Guitar Rig 5 Pro
PC and Mac compatible, Guitar Rig 5 Pro is another industry stalwart used by thousands of players globally. The cost is a pretty reasonable $199 and for your bucks you get 17 amps, 27 cabs, and 54 stompboxes/studio rackmount processors.
You can download a demo version to try out before you buy – but there’s also a free version of the software called Guitar Rig Player. It is pretty limited when compared to the full version but it can operate via DAW or standalone.
OK you only get a single amp model, but also 17 cab emulations and 13 effects. Not bad for free!
This list is by no means exhaustive but – we didn’t include Waves GTR 3, Audiofeed AmpLion Pro, Audio Media Research ReValver 4 or Scuffham S-Gear – for example but this isn’t a review of guitar amp software per se; it’s just to suggest a few options that will do a decent job.
It’s important to remember with amp sims that what you’re essentially getting is a compromise. There isn’t really a substitute for a quality guitar and amp, mic’d up with a decent microphone in the hands of a great guitarist.
But amp sims have really come on in recent years and today, they’re very, very good. When you consider the cost of the software, the fact that they enable you to play your guitar through your computer quietly (if you have to) – not to mention the plethora of amps, cabs and affects you have available, they’re a great option for bedroom guitarists and home recording enthusiasts alike.
Guitar to computer interface: another option
if you’re a gigging guitarist, or perhaps you have an extensive guitar rig at home, there’s a good chance you’ll have a guitar multi-effects unit. If you’re even luckier, that unit may just come equipped with a USB port.
If so, you’re in luck because this will provide the all-important guitar to computer interface that you need without having to shell out on a dedicated audio interface. All you’d do is select the unit as an interface within your DAW.
Summary
OK, we’ve established that you want to play guitar through your computer, let’s summarize this are in terms of the options you have:
- If you’re want to play/record electric guitar, you’ll most likely need an audio interface. You’ll need this to plug your guitar into and access either your DAW (and any amp sim software you have)
- If you want to mic up your guitar amp, you’ll still need an audio interface to plug the microphone into
- If you have a multi-effects unit with a USB port, you could use this as an audio interface and select it from the ‘Preferences’ section in your DAW
- If you have an electric-acoustic guitar you could plug directly into your interface or alternatively, use a decent microphone, plugged into your audio interface to capture the sound
- If you have an acoustic guitar with no pickup, use a condenser microphone, plugged into your audio interface to capture the sound of your guitar
